Happy Sunday everybody!
At home today working on my art and getting ready to list some new pieces on ebay. I have 5 pieces ending today and will be listing a few more tonight for next week.
Art auctions ending today
As part of my "escape my silly job" campaign, I have started a few new ebay IDs to sell some of the more mundane items I have around the house. One for just random items and one for the holiday items I make. At first I'll probably have to buy a few things in order to get some feedback. People don't like to buy things from newbies. So that's my latest strategy to replace my silly job income. I'm working on a few other ideas, but they'll take more time to set up.
My intent is to try and highlight the different things you can do to escape your own silly job and follow your dreams. I'll keep you updated on what's working for me and what's not worth the time involved.
Friday I made a list of all our expenses and what we could do to cut back. One goal I have is to pay off my car in the next few months. That will free up about $300 a month between car payment and downgrading to liability only insurance. Our car is at the point where if something happens they'll just total it out. So there's not much point in full coverage anymore.
We also looked at a couple of our bills, like cable, and talked about what we "need" versus what we want. Currently, our cable/internet bill is about $220 a month. I know...everybody gasps and shakes their heads when they hear that number. But we really don't have any other entertainment expense. We don't go out so we bring the entertainment to us. But we also don't really need the movie channels. Another part of our entertainment expenses is Netflix. We have the $35 dollar plan which gives us 3 dvds at a time. But we almost exclusively use the streaming feature. So we're going to downgrade to the $9 a month plan. This still allows us 1 dvd if we want and all the streaming rights. The trick here is to cut back on spending without having to give up the things that are important to you.
After all of our budget cuts we will be saving $617 a month, or $7404 a year. That takes our income requirement down to $305 a week from $460 a week. Think about that...$305 a week. Between Eric and I, if we can't figure out how to generate $300 a week, we're in big trouble. My plan is to work no more than 2 days a week at a "job". All other income will be generated by working for ourselves. That's the plan anyway. :-)
Ok, I've rambled on long enough. It's time for me to get back to work. Have a great day everybody. Maybe take a bit of time today to make a list of how you could trim some fat from the family budget. You'll be surprised by how much you can do without, without really changing how you live.
Sunday, June 19, 2011
Friday, June 17, 2011
TGIF...Seriously!
This week my silly job has been especially challenging. I won't go into all the mundane details, but let's just say it involved me going in at 5am three days in a row...and then working for 10 or more hours. And there is still more to do. I really could have gone in today and worked some more, but I think I might collapse if I don't take a day off. I really don't mind hard work. It makes the time go faster. But this week I'm dealing with a sinus infection, a strained back muscle, sore knees, and general exhaustion. So I'm taking the day off and working on art all day.
I have new art listed on ebay. It ends this Sunday evening around 6pm. I have a few watchers, so hopefully I get some bids. Between the economy and it being the summer, there isn't a lot of art selling right now. I feel good that I at least have people looking at my art. I'm also selling some comic books I bought in a large lot and 2 snow globes for Eric's mom. I decided if I'm going to eventually quit my silly job, I should probably diversify my auctions. Not putting all my eggs in one basket sort of thing.
Besides working on art I'm going to spend some time today really looking at my finances and the minimum amount of income I need to survive. I also need to spend some time researching some other income ideas I have. I need a clear picture of what I need and how I'm going to get it. I need a strict but sensible plan. Next time I'll hopefully be able to share some of the specifics of my plan.
So I'm off to work...the good kind, not my silly job :-) I'll post again Sunday. Have a great day!
http://shop.ebay.com/photolabspaz/m.html?_adv=1&_dmd=1&_in_kw=1&_ipg=50&_sop=12&_rdc=1
Saturday, June 11, 2011
Why can't things be easy?
So last night Eric found a site where I could upload my art and people could buy prints and t-shirts, greeting cards, etc. So I opened an account and decided I would get up early so I could start uploading pics before going off to my silly job. So here I sit, coffee by my side, all ready to get serious about this and guess what....it would appear that the image size required by ebay is smaller than the image size required to create prints and other products from my art. So what does this mean? I have to re-scan every single piece. *sigh* Why couldn't it just be easy? lol
Oh well, I guess I know what I'm doing when I get home from my silly job tonight. And I'm off tomorrow, so I should have time to get them all scanned. Of course it would be nice to actually have time to work on some art. :-) But enough whining for today. Once I get everything scanned and uploaded it should be pretty cool. And artists get discounts on their own art so I think I'm going to order some greeting cards of my art to send to friends and family. Should be cool and a good way to promote my art.
I guess it's time to go get ready for work. As soon as I get everything scanned and uploaded I'll post a link and let you know how it went. Have a happy day! :-)
PS:
I'm adding this on Sunday 6/12/11. I didn't want to start another whiny post, lol, but I'm still having problems with images. I put the finishing touches on 2 paintings this morning, got all my stuff organized, and got ready to start scanning my images. Guess what...scanner isn't working. Apparently when color ink is low, scanner doesn't work. Not to sound like a conspiracy theorist, but you know they have to program the printer to do that, right? There is no legitimate reason to not scan if the printer is out of ink. Even if I was trying to scan so I could immediately print, why wouldn't it show the error message at the printing stage? Argh! Eric has the car today so it's not like I can run out and grab some ink. And my next day off is Friday. These are the types of situations that occur when trying to work from home. I guess the lesson here is to stock up on office supplies the next time I get a coupon or there's a good sale. Instead of scanning I'll go try to take some decent pictures of my paintings. Happy Sunday, everyone! And GO MAVS!!!! :-)
Wednesday, June 8, 2011
Good afternoon! Process part two.
Good afternoon everyone. This post is a bit later than I had anticipated. I had to take my car in for new brakes this morning. I got home a couple hours ago and finished up the last few details and pictures of my latest painting. So without further ado:
Once I have the base color of the design in place I find a coordinating, darker color to add shadows. I mix this color with the Golden glass bead medium and apply to the larger shadow areas. This adds shadow and texture all at the same time. In this painting, because the base color was orange I mixed red with a touch of the orange to create the deeper orange shadow color.


Once I have the base color of the design in place I find a coordinating, darker color to add shadows. I mix this color with the Golden glass bead medium and apply to the larger shadow areas. This adds shadow and texture all at the same time. In this painting, because the base color was orange I mixed red with a touch of the orange to create the deeper orange shadow color.

I let that dry for a few minutes so I'm able to go back over it without moving the glass beads around. Once it is stable I drybrush over the beaded area with the base coat. By just brushing the tips of the raised area with the orange, it gives another layer of dimension and depth. Because of the flash it might be hard to see the difference. But trust me, it makes a big difference. By brushing the orange over the reddish orange areas it blends the two together.

The next step is to go in with a lighter yellow in the highlight areas. This gives the piece a more dimensional, rounder feel to the branches.

And finally I go back in with a 3/0 round brush (very tiny) and lay in some white high highlights. This adds that extra pop to the piece.

After that I go back over the piece with a fine tooth comb looking for any areas that need a bit more highlight or shadow and finally sign the piece.

One thing to keep in mind, is that any frame will cover the outside edge of the piece by 1/4 of an inch. So don't sign your piece in the very corner. You want people to see the artist's name after it's framed. Don't be afraid to bring your sig up and in a bit to accommodate for that 1/4 of an inch.
So there you have it. My complete process for creating a painting. My drawings are very similar but with different materials. Maybe I'll document that process when I start working on drawings again. This is kind of fun. :-)Thanks for your interest. Have a happy day.
Tuesday, June 7, 2011
Good Morning....*yawn*
So I was woken up this morning to the soothing sounds of the EAS emergency broadcast signal. At least now I know if the apocalypse happens while I'm asleep, EAS will wake me up. :-) Since I'm up I thought I would write a new post.
My friend Joe told me I should write a post detailing my process. I have been taking photos at various stages of my newest painting. This should give you an idea of how one of my paintings comes to life.
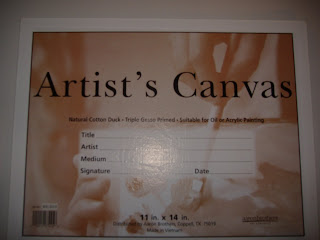
Way back when I started painting I built my own stretcher bars and stretched my own canvas. Then when I got this job I was able to buy good quality pre-stretched canvases. But now I've moved on to what I think is the best thing for my art; canvas panels. The nice thing about canvas panels is that they are less expensive to ship and they are much easier to frame. They come in the same standard sizes ready-made frames do, so the owner can pop out the glass, pop in the art, and pop the backing back in. Pop, pop, pop, and you've got a framed piece of art ready to hang on your wall.


My friend Joe told me I should write a post detailing my process. I have been taking photos at various stages of my newest painting. This should give you an idea of how one of my paintings comes to life.
Way back when I started painting I built my own stretcher bars and stretched my own canvas. Then when I got this job I was able to buy good quality pre-stretched canvases. But now I've moved on to what I think is the best thing for my art; canvas panels. The nice thing about canvas panels is that they are less expensive to ship and they are much easier to frame. They come in the same standard sizes ready-made frames do, so the owner can pop out the glass, pop in the art, and pop the backing back in. Pop, pop, pop, and you've got a framed piece of art ready to hang on your wall.

The first thing I do is to spread light modeling compound on the canvas. It gives the piece a nice texture that adds an additional layer of dimension. Later in the piece I use glass seed bead medium to add even more dimension. I use either Liquitex or Golden mediums. I prefer Golden, but the Liquitex work just as well.

Next I work on the background. I use acrylic paints in three different colors. I add a bit of water to the brush to thin the paints a bit.

I'm not sure if you can tell the difference here, but once the background is almost dry I go over it very lightly with white. I use a drybrush technique. This is to soften the color just a little and it also highlights some of the texture created with the modeling compound. Then I spray the whole piece with final fixative so I can draw and erase on the surface.

The next step is to lightly sketch my design with pencil. I go back over it with a black Prisma marker. I like the way the outline looks in the finished piece plus it gives me nice sharp lines for the ends of the swirls.

Next I fill in the design with acrylic paint. I like to pick bright colors that are in a sort of medium range. This allows me to go back in and add highlights and shadows that really pop.

So that ends part one of my process post. I have to get ready to go to my silly job now. :-( I'll leave the house at 8am and won't get home until about 9pm. How the heck am I supposed to get any art finished this way? Well, I'm off tomorrow so hopefully I'll be able to finish this piece and post the second half of my process. Until then, happy arting!
TAM
Sunday, June 5, 2011
A few pictures of my art
Hello again! :-)
I thought you might like to see a bit of my art. Plus I wanted to figure out how easy (or not) it is to add pics. These are a few of the drawings I sell on ebay. I started with the drawings and have received a lot of positive feedback. My friend Joe encouraged me to do larger paintings in the same style. So in the next few days and weeks I'll show you how I'm progressing with that. But for now, enjoy a few of my happy trees:


I thought you might like to see a bit of my art. Plus I wanted to figure out how easy (or not) it is to add pics. These are a few of the drawings I sell on ebay. I started with the drawings and have received a lot of positive feedback. My friend Joe encouraged me to do larger paintings in the same style. So in the next few days and weeks I'll show you how I'm progressing with that. But for now, enjoy a few of my happy trees:


I create these drawings in 3 different sizes; 2 1/2 x 3 1/2 (aceo), 5 x 7, and 8 x 10. Each one is an original. I really love making them. Thanks for looking!
My ebay name is photolabspaz. I know, it's weird. lol. But I started it back when I was working in a photo lab and if I change it they put sunglasses next to your name so people think you're hiding something. So photolabspaz it is. :-)
TAM '11
First Day Jitters
Hello! As you may have guessed by the name of this blog, my name is Michelle and I'm an artist. I attempted to start a blog a year or so ago, but wasn't disciplined enough to make it stick. But the fact is I need to do this. My best friend Joe and his wife Kimsha have started living the dream. They are supporting themselves solely through their art. And if I ever want to live my dream, I have to do what it takes to make it happen. So here I am. :-)
This blog will hopefully document my journey to leave my job and become the artist and entrepreneur I have always dreamed of being. I am willing to have less money, buy fewer things, make a dollar stretch until it snaps, and work every minute of every day. But first,maybe I should tell you a little more about myself.
As I said before, my name is Michelle, and I'm 42. I'm currently in the second major relationship of my life. My ex husband and I were together for 14 years. At some point it occurred to me that not only did we have nothing in common, we didn't really even like each other. So I packed my computer, clothes, and art supplies in my van and moved half way across the country. Then began my second and current major relationship. Eric and I have been together for 8 years now and I'm happy to report that we still like each other. So far, so good.
When I moved here I quickly realized that I would have to get a job. Not knowing what else to do, I ended up in retail. Over the years I've been promoted and gone into specialty retail management. While I won't say where I work, I will say it provides me with a lot of discounts on art supplies. :-) I actually took this job so that I could work in an environment of art and artists. Unfortunately, I work so many hours and my job is so silly, I hardly have any free time to work on my art. So, that is the journey you and I will be taking through this blog. How does a 42 year old woman reinvent herself as an artist and entrepreneur? The first step has been taken; starting this blog. I hope you keep walking with me. Thanks for reading! :-)
PS: Had to edit to change font. Georgia is awful on this layout, lol.
Subscribe to:
Posts (Atom)